 Fires related to clothes dryers, usually the result of lint build-up, are the number one cause of all household fires. According to the National Fire Protection Association, they make up 92% of home structure incidents. Most of them start in the laundry room.
A combination of fluff, fleece, wool and fuzz, these materials are found in lint traps or in the exhaust duct and quickly become a very real hazard.
The fact is most dryers are located in confined areas, sometimes even stacked on top of the washer in closets. Access is very difficult as dryers typically have their exhaust coming out near the bottom at the rear. This is just about the hardest place to reach in a constricted spot especially when the dryer is configured side by side with the clothes washer.
To have access to the rear connection, you’ll have to pull the dryer away from the wall. Having flexible duct long enough to reach the outlet would make this easy but once the dryer is pushed back against the wall, the duct tends to get squished. This creates a potentially dangerous obstacle to the hot air coming out of the dryer.
Keep in mind lint will build up against the ribs of the duct, in tight turns and particularly in flattened sections. These are also the places that tend to get incredibly hot, potentially leading to a fire.
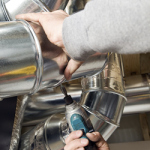
In the past it was common to connect your dryer with cheap white plastic hose from a hardware store. This method is now considered unsafe. New international standards advise not using flexible ducts. They collect more debris and can be easily crushed. These new standards recommend using metal ducting.
However, in the U.S., Underwriter Laboratories established an approved standard for flexible high temperature exhaust duct, that can also be used on both electric and gas dryers.
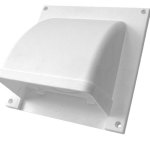
To prevent lint getting caught is to avoid using screws to attach metal ducting. The male end at every connection should point away from airflow. The duct should vent to the outside at least three feet from any opening and have a termination cap with a backdraft damper. There should be no screen that can trap lint.
Sometimes, there is a wall cap almost level with the dryer exhaust. Some installers recommend the option of using an offset dryer vent, which is a box made of metal with two openings that adjust by sliding on tracks. The openings are aligned to the two vents and attached with short lengths of 4” duct. Still, the box would probably trap lint and would need to be cleaned regularly.
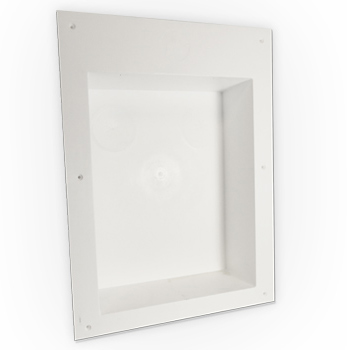
How to create space for vent connection
So, how does one make the 90-degree turn from the dryer exhaust vent up to rigid ducting without using a lot of space at the back of the dryer? One option is a dryer outlet box. These create the space necessary behind the dryer to make turns with full airflow and are designed to fit standard 16” center stud construction. They can have up to six 4” diameter knockouts in the most common positions, which are pre-scored to make punch-out quicker and can be cut with a sturdy pocket knife.
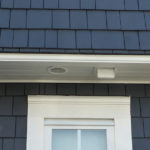
Once the 4” duct passes within the wall it can lead up to a wall cap or sometimes through the ceiling and out to a soffit. Make a turn in a tight space easier with a 90-degree squeeze elbow.
In the case of soffits, using a cap that bends away from the building will prevent the moist air from re-entering.
While familiar installations using flexible white hose seem like an easy solution, consider using safer venting accessories and you’ll greatly reduce any fire hazards.