 In the past, cold drafty houses were the norm. We cranked up the heat to force all that chilly air out. There was also a greater tolerance for uncomfortably warm homes in summer months. But now, whole house air conditioning is so prevalent they can affect entire electric power grids during heat waves.
Over the years, building codes have called for ever-increasing amounts of insulation as we strive to keep energy costs down. On top of that, to prevent air leakage there must also be an air barrier and then a vapor barrier to prevent moisture getting in. More recently, there’s also the requirement for rainscreen and compatible wall caps to allow the structure to dry out and prevent rot.
For exterior walls, the four-inch standard that could only accommodate R12 fiberglass insulation has now been replaced with six-inch walls that will allow R20 batts. This only fills the cavities between the studs and plates.
There’s still a problem.
The wooden studs themselves, usually spaced at sixteen inches, conduct heat from the interior to the outside of the building. This is referred to as thermal bridging and when the windows and doors are taken into consideration, the overall “R-value” of the building envelope is greatly reduced.
One useful solution is to add rigid foam insulation to the outside of the wood-frame construction. This insulates the structural wood components from the exterior siding, stone or stucco layer, and also acts as a moisture control layer!
Rigid foam sheathing comes various sizes and thicknesses, usually with an R-value of 4 to 5 per inch. Composite panels are also available that replace plywood sheathing and traditional air and vapor barriers, as well as the rainscreen system.
Keep in mind it’s very important that the sheathing be sealed at all joints to produce a continuous layer without any breaks. Also, window and doors should be boxed with plywood to extend past the foam and provide a surface for sealing tape. Remember, all seams need to be sealed with exterior grade tape or caulk.
Instead of one thick layer, another improvement would be to use two thinner layers of foam with offset joints. These would create an effective seal especially in corners where there would be a woven effect.
You can create a rainscreen by nailing strapping at regular intervals to the outside of the foam attaching it to the studs. This creates a gap behind the exterior layer. It needs to be sealed at the bottom with a bug screen. Ideally, look for one with a wide drip edge to prevent water dripping on the fascia and foundation below.
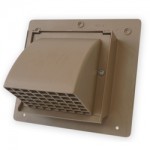
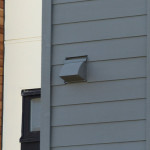
Wall caps and vents
Other than windows and doors, the main compromise to building envelopes are wall caps or vents that pass through the exterior wall. These need to accommodate the rainscreen gap and seal effectively to the air and vapor barriers. The durable plastic types are great at this.
Adding rigid foam insulation works for old homes too. In fact, some provinces and states provide grants for this.
In a retrofit project, current siding must be removed so that the foam insulation can be attached to the existing plywood or oriented strand board (OSB). The panels would act as a moisture control layer and a rainscreen gap could be created with strapping before re-attaching siding.
Regardless, there are plenty of incentives from adding this to older homes just from the reduced energy bills alone!